
Welcome to the Honeywell Pro Series Thermostat installation guide. This manual helps you install and configure your Honeywell Pro Series thermostat efficiently. Designed for reliability and energy efficiency, it offers advanced temperature control solutions for your home.
Key Features:
– User-friendly interface for easy operation;
– Compatible with various HVAC systems.
– Smart home integration capabilities.
– Energy-saving modes to reduce utility bills.
This guide provides step-by-step instructions to ensure a smooth installation process.
1.1 Overview of Honeywell Pro Series Thermostats
The Honeywell Pro Series thermostats are designed to provide precise temperature control and energy efficiency. These thermostats cater to various HVAC systems, including 1 Heat/1 Cool and 2 Heat/1 Cool configurations. Models like the TH3110D and TH3210D offer non-programmable digital options, while the FocusPRO P200 and S200 Series include smart features. The Pro Series is known for its user-friendly interface, compatibility with different systems, and advanced features like smart home integration. This overview highlights the versatility and reliability of Honeywell Pro Series thermostats, making them a popular choice for homeowners seeking efficient climate control solutions.
1.2 Key Features of the Honeywell Pro Series
The Honeywell Pro Series thermostats offer a range of innovative features. They include programmable and non-programmable options, smart home integration via the Resideo Pro app, and energy-saving modes. These thermostats are compatible with various HVAC systems, ensuring versatile installation options. The FocusPRO and T6 Pro models provide touchscreen interfaces and Wi-Fi connectivity for remote control. Additionally, they support automatic system changeover between heating and cooling. These features enhance convenience, efficiency, and performance, making the Pro Series a comprehensive solution for modern home climate control.
Pre-Installation Requirements
Verify system compatibility and electrical requirements. Ensure tools like screwdrivers and wire strippers are available. Additional materials may be needed for specific HVAC configurations.
2.1 System Compatibility Check
Ensure your HVAC system is compatible with the Honeywell Pro Series Thermostat. Check the system type (e.g., 1 Heat/1 Cool, 2 Heat/1 Cool) and voltage requirements. Refer to the manual for specific models like TH3110D or TH3210D. Verify if your system supports advanced features like smart home integration or energy-saving modes. Compatibility ensures proper functionality and avoids installation issues. Always match the thermostat model with your HVAC system specifications for optimal performance and reliability.
2.2 Tools and Materials Needed
To install the Honeywell Pro Series Thermostat, gather the following tools and materials: a screwdriver (Phillips and flathead), wire strippers, voltage tester, and a drill with bits. Ensure you have the thermostat unit, mounting hardware (e.g., wall anchors, screws), and wiring labels. Refer to the installation manual for specific requirements based on your model (e.g., TH3110D or TH3210D). Additional materials like a level or wall plate may be needed for proper mounting. Always turn off power to the HVAC system before starting the installation to ensure safety.
Installation Steps
Begin by turning off power to your HVAC system. Remove the old thermostat and install the Honeywell Pro Series unit. Follow the wiring guide carefully. Mount the thermostat level and secure it. Connect the wires to the appropriate terminals. Turn the power back on and test the system to ensure proper function. Refer to the manual for specific wiring diagrams and troubleshooting tips. Complete the setup to enjoy efficient temperature control.

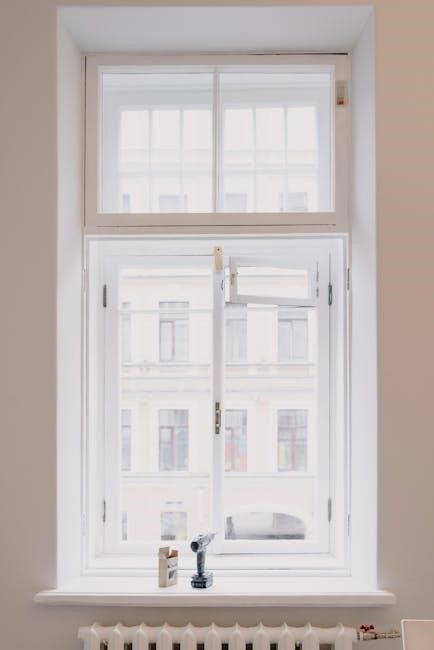
3.1 Mounting the Thermostat
Ensure the wall surface is clean and level. Use the UWP mounting system for secure installation. Align the thermostat base with the wall anchors. Gently press the device onto the mounts until it clicks. Verify the thermostat is level using a spirit level. For models like the T6 Pro, ensure proper alignment with the slider tab. Tighten the screws firmly but avoid overtightening. Use a screwdriver for final adjustments. FocusPRO models may require additional steps, such as pairing with the Resideo Pro app. Refer to the manual for specific mounting requirements and diagrams.
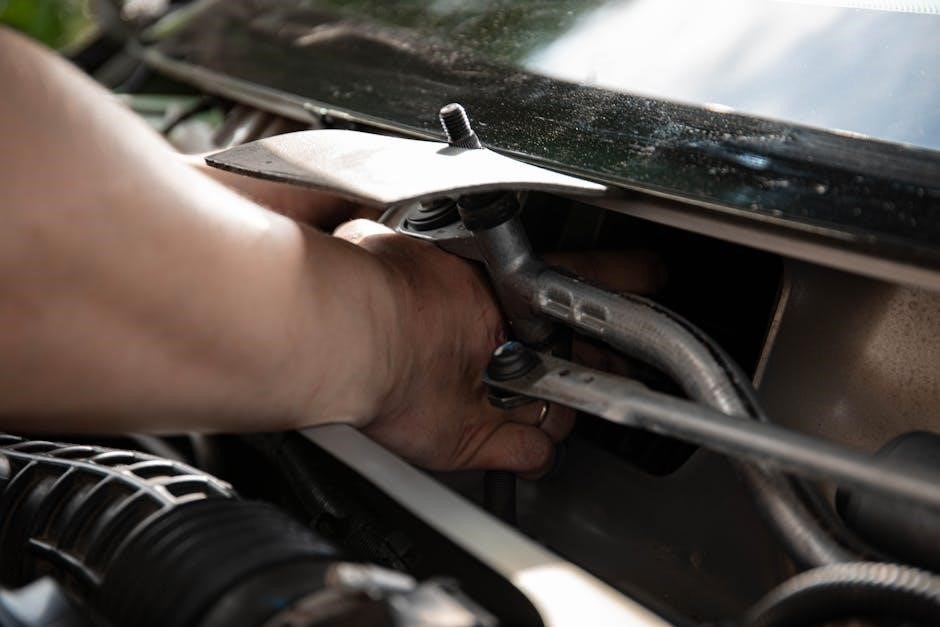
3.2 Wiring the Thermostat
Before wiring, turn off the power to your HVAC system at the circuit breaker. Identify the terminals on your Honeywell Pro Series thermostat, typically labeled R, W, Y, G, C, and O/B. Refer to your system’s compatibility (e.g., 1 Heat/1 Cool or 2 Heat/1 Cool) to match wires correctly. Secure the wires to the appropriate terminals using a screwdriver. For smart models like the T6 Pro, ensure the C (common) wire is connected for Wi-Fi functionality. Double-check all connections and turn the power back on to test the system. Use the Resideo Pro app for smart thermostat configurations.
3.3 Connecting the Wires to the HVAC System
Match the wires from the thermostat to your HVAC system’s terminal labels (e.g., R, W, Y, G, C, O/B). For 1 Heat/1 Cool systems, connect the wires accordingly. Ensure the C (common) wire is connected for smart models like the T6 Pro. Secure all connections firmly. If using a dual-fuel system, verify the O/B wire configuration. After wiring, use the Honeywell Home app to complete the setup. Double-check all connections to avoid errors. Turn the power back on and test the system to ensure proper operation. Refer to your HVAC system’s manual for specific compatibility details.
Configuration and Setup
Use the Honeywell Home app to configure your thermostat. Adjust temperature settings, enable smart features, and set up schedules. Refer to the manual for advanced options.
4.1 Setting Up the Thermostat
After installation, power on the thermostat and select your preferred language. Choose between heating, cooling, or both. Set the time and date manually or sync with your Wi-Fi. Use the Honeywell Home app to pair your thermostat for remote access. Adjust temperature settings and preferences according to your comfort needs. Test the system to ensure proper functionality. Refer to the manual for any additional setup options or advanced configurations to optimize your Honeywell Pro Series Thermostat performance. Ensure all settings are saved before proceeding. This completes the basic setup process.
4.2 Programming the Thermostat
Program your Honeywell Pro Series Thermostat by accessing the menu and selecting the scheduling option; Choose a pre-set schedule or customize it to fit your daily routine. Set specific temperatures for different times of the day, such as wake, leave, return, and sleep. Enable energy-saving modes like Eco or Away to reduce energy usage when the house is unoccupied. Use the Honeywell Home app to program remotely and ensure your settings are synchronized. Save your schedule to maintain consistent temperature control and optimize energy efficiency. Regularly review and update your program to adapt to changing needs.

Advanced Features
The Honeywell Pro Series Thermostat offers smart home integration, enabling voice control and app-based adjustments. It also features energy-saving modes to optimize heating and cooling efficiency seamlessly.
5.1 Smart Home Integration
The Honeywell Pro Series Thermostat seamlessly integrates with smart home systems, offering enhanced control through the Honeywell Home app and Resideo Pro app. Compatible with popular platforms like Amazon Alexa and Google Assistant, it allows voice commands and remote adjustments. The T6 Pro Wi-Fi model exemplifies this feature, enabling users to manage temperatures and schedules effortlessly. This integration simplifies energy management, optimizing comfort and efficiency. Ensure your thermostat is connected to your home network during setup for full smart functionality.
5;2 Energy-Saving Modes
The Honeywell Pro Series Thermostat offers advanced energy-saving modes to minimize energy consumption while maintaining comfort. These modes include Smart Response Technology, which learns your schedule and preferences to optimize heating and cooling. The thermostat also features Geofencing, adjusting temperatures based on your location. Additionally, it includes programmable settings to reduce energy use during off-peak hours. These modes work seamlessly with smart home integration, ensuring your system operates efficiently. By utilizing these features, you can significantly lower utility bills while enjoying a comfortable home environment year-round.
Troubleshooting Common Issues
Address common problems like connectivity issues, incorrect wiring, or temperature mismatches. Refer to the manual for diagnostic tools and step-by-step solutions to ensure optimal performance.
6.1 Common Installation Mistakes
Common mistakes during Honeywell Pro Series installation include incorrect wiring connections, improper mounting, and failure to follow the manual’s step-by-step guide. Ensure all wires match their designated terminals. Verify system compatibility before starting. Incorrect mounting can lead to inaccurate temperature readings. Always refer to the provided diagrams and instructions to avoid errors. Double-check connections to prevent malfunctions. Proper installation ensures optimal performance and energy efficiency. Consulting the manual or a professional is recommended if issues persist.
6.2 Solving Connectivity Problems
Connectivity issues with the Honeywell Pro Series Thermostat can often be resolved by restarting the device and ensuring a stable internet connection. Verify that the thermostat is properly connected to your Wi-Fi network and that the router is functioning correctly. Check for any software updates, as outdated firmware may cause connectivity problems. If issues persist, reset the thermostat by removing it from the Honeywell Home app and reconnecting it. Ensure the thermostat is within range of your router for optimal signal strength. Consulting the user manual or contacting support can provide additional troubleshooting steps.
With your Honeywell Pro Series Thermostat installed, enjoy energy efficiency and smart home integration. Regular updates and maintenance ensure optimal performance. Happy heating and cooling!
7.1 Final Checks and Verification
After completing the installation, perform a final check to ensure everything functions correctly. Turn on your HVAC system and verify heating and cooling modes work as expected. Check the thermostat display for accuracy and responsiveness. Ensure all wires are securely connected and the thermostat is properly mounted. Review the setup to confirm programming and smart home integrations are active. Test remote access via the Honeywell Home app if applicable. Verify energy-saving modes and scheduling features are operational. Address any issues promptly to ensure optimal performance and energy efficiency.
7.2 Maintenance Tips
Regularly clean the thermostat’s display and vents to ensure proper function. Replace batteries when needed to avoid shutdowns. Use the Honeywell Home app to monitor and update settings. Check wiring connections annually to prevent loose links. Schedule HVAC system tune-ups to maintain efficiency. Update software via the app for optimal performance. Inspect the thermostat’s mounting for stability. Ensure proper temperature calibration for accuracy. Replace air filters as recommended to enhance system airflow. These steps ensure long-term reliability and energy savings.
No Responses