
Wind spinners are decorative outdoor items that add beauty to gardens. Assembly instructions guide users through installation, ensuring stability and proper function. Clear steps are essential for successful setup.
What Are Wind Spinners?
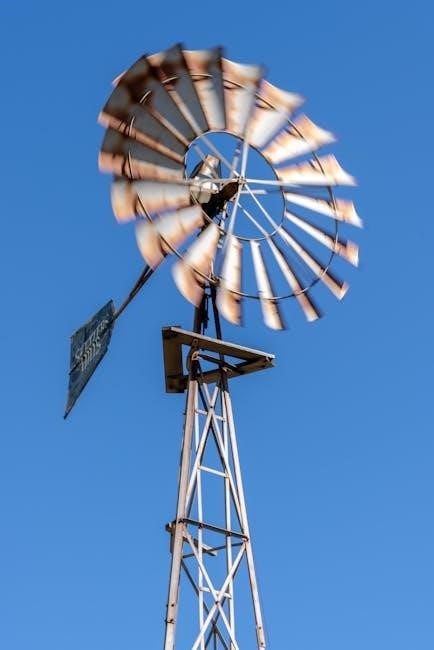
Wind spinners are decorative outdoor items designed to spin in the wind, adding visual interest to gardens and yards. They typically feature blades or sails attached to a central axis, creating a dynamic display of motion. Available in various designs, materials, and sizes, wind spinners are popular for their aesthetic appeal and ability to enhance outdoor spaces. Customers often find them pretty and fun to assemble, with good quality and value, making them a popular DIY project for gardening enthusiasts.
Why Assembly Instructions Are Important
Assembly instructions are crucial for ensuring wind spinners are correctly installed and function properly. They provide step-by-step guidance, reducing confusion and minimizing errors. Proper assembly ensures stability, safety, and optimal performance. Mixed feedback on instructions highlights the need for clear, detailed guides. With good instructions, users can avoid common mistakes, such as over-tightening or misaligning components, leading to a successful and enjoyable DIY experience for garden enthusiasts.

Materials and Tools Needed for Assembly
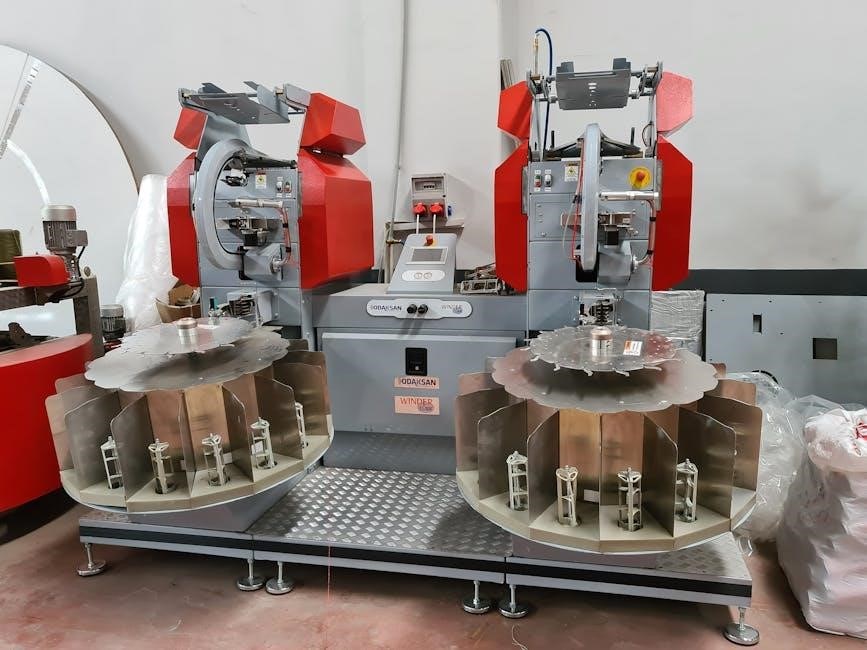
A typical wind spinner kit includes blades, rotor, shaft, hub, and mounting hardware. Essential tools are screwdrivers, wrenches, and bolts for secure assembly and stabilization.
Components of a Typical Wind Spinner Kit
A wind spinner kit usually includes pre-cut blades, a central rotor, a shaft, and a hub assembly. Additional components may feature a base plate, screws, and stabilizing hardware. Decorative elements like reflective tape or paint may also be included for customization. The kit is designed to be user-friendly, with clear labeling to guide assembly. Ensure all parts are inventoried before starting to avoid delays. Optional items, such as adhesive or lubricant, may enhance durability and performance.
Tools Required for Assembly
Essential tools include a screwdriver, wrench, and hammer for securing parts. A drill may be needed for pre-drilling holes. Pliers and a tape measure can assist with alignment. Safety gear like gloves and goggles is recommended. Optional tools include sandpaper for smoothing edges or paint for customization. Ensure all tools are within reach to streamline the process. Proper tools ensure a secure and balanced assembly, preventing potential issues during operation.
Step-by-Step Assembly Guide
This guide provides clear instructions to help you assemble your wind spinner efficiently. Follow each step carefully to ensure a functional and visually appealing result;
Understanding the Components and Their Functions
A typical wind spinner kit includes blades, a rotor, shaft, hub, and base. The blades catch wind for rotation, while the rotor and shaft connect to the hub, which secures the assembly. The base stabilizes the spinner. Each part is essential for smooth operation and durability, ensuring the spinner functions as intended once assembled correctly.

Attaching the Blades to the Rotor
Align each blade with the rotor’s designated slots, ensuring proper fit. Secure blades using provided screws or clips. Tighten firmly but avoid over-tightening to prevent damage. Ensure blades are evenly spaced and balanced for smooth rotation. Proper attachment is crucial for the spinner’s performance and longevity.
Installing the Shaft and Hub Assembly
Begin by positioning the shaft vertically in the base. Ensure the area is level and clear. Attach the hub assembly to the shaft using the provided bolts, tightening them evenly. Avoid over-tightening to prevent damage. Double-check alignment and stability before proceeding. Proper installation ensures smooth operation and durability of the wind spinner.
Securing the Base and Stabilizing the Spinner
Place the spinner base on a flat surface and ensure all screws are tightly secured. Use ground stakes to anchor the base firmly into the soil for stability. Check the spinner’s balance by gently spinning it to ensure even rotation. Make adjustments if necessary to prevent wobbling. Proper stabilization ensures the spinner operates smoothly and withstands various weather conditions without toppling over.
Aligning and Balancing the Rotor
Ensure the rotor is level and aligned with the spinner’s axis. Check each blade for equal length and angle to maintain balance. Gently spin the rotor to detect any wobble. If imbalance occurs, adjust the blades by bending them slightly or tightening loose connections. Proper alignment ensures smooth rotation and prevents instability. A balanced rotor enhances performance and extends the spinner’s lifespan by reducing wear on moving parts.

Common Mistakes to Avoid During Assembly
Avoid over-tightening or under-tightening bolts, as this can cause instability or damage. Ensure all parts are correctly aligned to prevent imbalance and ensure smooth operation.
Over-Tightening or Under-Tightening Bolts
Over-tightening bolts can strip threads or bend metal components, leading to structural weakness. Conversely, under-tightening may result in loose parts and instability. Always use a torque wrench and follow specified tension values to ensure bolts are securely fastened without excessive force. Proper tightening ensures the wind spinner remains stable and functions smoothly, avoiding potential damage or safety hazards.
Incorrect Alignment of the Rotor
Misaligning the rotor can cause uneven spinning, reduced performance, and potential damage to the wind spinner. Ensure the rotor is straight and level during installation. Double-check the alignment with the shaft and hub assembly. Use a level tool if necessary to confirm proper positioning. Incorrect alignment may lead to wobbling or noisy operation, undermining the spinner’s stability and visual appeal. Always refer to the assembly manual for precise alignment guidelines to achieve optimal functionality and longevity.
Safety Tips and Precautions
Always handle sharp edges with care and wear gloves. Ensure the area is clear of obstacles to prevent accidents. Follow all safety guidelines provided in the manual.
Handling Sharp Edges and Small Parts
When assembling a wind spinner, handle sharp edges carefully to avoid injuries. Use gloves to protect your hands and ensure small parts like screws and clips are kept out of reach of children. Proper storage of these components prevents accidental ingestion or misplacement. Always follow the manufacturer’s guidelines for safe handling and assembly to ensure a secure and enjoyable experience with your wind spinner.
Ensuring Stability to Prevent Accidents
Properly securing the wind spinner base is crucial for stability. Follow the instructions to tighten bolts firmly and level the ground before installation. Soft surfaces like grass provide better grip, reducing the risk of the spinner tipping over. Regularly inspect the base and surrounding area to ensure nothing obstructs the spinner’s rotation. A stable setup prevents accidents and prolongs the life of your wind spinner, ensuring safe enjoyment.
Customizing Your Wind Spinner
Customizing your wind spinner enhances its visual appeal. Paint the blades with vibrant colors or add reflective details for a unique look. Personalize it to match your garden style.
Painting or Decorating the Blades
Painting or decorating the blades adds a personal touch to your wind spinner. Use durable, weather-resistant paints to ensure longevity. Choose vibrant colors or metallic finishes for visual appeal. Before painting, clean the blades thoroughly and apply a primer for better adhesion. Allow the paint to dry completely before assembling the spinner. Creative designs or patterns can make your wind spinner stand out in your garden or yard, reflecting your personal style and enhancing its aesthetic charm. Always follow safety precautions while handling paint and materials.
Adding Reflective or Glow-in-the-Dark Details
Enhance your wind spinner’s visibility with reflective or glow-in-the-dark details. Apply reflective tape or stickers to the blades for increased visibility at night. Glow-in-the-dark paint can be applied to specific areas, ensuring the spinner remains visible in low-light conditions. These additions not only improve safety but also add a unique aesthetic appeal. Ensure all materials are weather-resistant and follow the manufacturer’s instructions for application. This step can make your wind spinner more functional and visually striking, especially during evening hours.
Troubleshooting Common Issues
If the spinner isn’t moving smoothly, check for tight bearings or misaligned parts. Ensure no debris obstructs the blades. Lubricate moving components if necessary to restore proper rotation.
Spinner Not Spinning Freely
If your wind spinner isn’t spinning freely, inspect the rotor and blades for obstructions. Ensure all bolts are securely tightened but not over-tightened, as this can restrict movement. Check for debris like dirt or leaves that may be blocking the blades. Verify that the hub assembly is properly aligned and lubricate the bearings if necessary. If the issue persists, consult the assembly manual or consider adjusting the balance of the rotor for smoother operation.
Noise During Operation
Noise during operation can occur due to loose parts, misaligned components, or friction. Inspect the rotor and hub assembly for proper alignment. Ensure all bolts are tightened securely but avoid over-tightening, which can cause strain. Clean the moving parts to remove dirt or debris that may cause friction. Apply a small amount of lubricant to the bearings if necessary. If noise persists, check for imbalanced blades or uneven weight distribution, as this can disrupt smooth rotation and generate noise.
Maintenance and Upkeep
Regular cleaning and lubrication ensure smooth operation. Remove dirt from blades and rotor to prevent damage. Lubricate moving parts annually for optimal performance and longevity.
Cleaning the Blades and Rotor
Regular cleaning ensures optimal performance and extends the lifespan of your wind spinner. Use a soft cloth, mild detergent, and distilled water to wipe down blades and rotor. Avoid abrasive materials that may scratch surfaces. Rinse thoroughly to remove dirt and residue. Dry components completely to prevent rust or corrosion. For best results, clean every few months or after severe weather. This simple maintenance step keeps your wind spinner looking new and functioning smoothly.
Lubricating Moving Parts
Lubricating moving parts ensures smooth operation and prevents wear. Apply a silicone-based spray to hinges, bearings, and the rotor shaft every 2-3 months. This reduces friction and extends the spinner’s lifespan. Wipe off excess lubricant with a clean cloth to avoid attracting dirt. Regular lubrication keeps your wind spinner spinning effortlessly and maintains its durability. This simple step is crucial for long-term performance and satisfaction with your outdoor decoration.

Completing your wind spinner assembly is a rewarding experience, bringing a sense of accomplishment and outdoor beauty to your space. Proper assembly ensures durability and enjoyment.

Final Tips for Successful Assembly
Ensure all parts are thoroughly inspected before assembly. Double-check each step in the manual to avoid errors. Use templates if provided for precise alignment. Tighten bolts firmly but avoid over-tightening. Regularly lubricate moving parts for smooth operation. Verify the spinner’s balance to prevent wobbling. If unsure, consult additional resources or seek advice from experienced enthusiasts. Taking your time and staying organized will lead to a successful and enjoyable assembly process.
Enjoying Your Newly Assembled Wind Spinner
Once assembled, your wind spinner will bring vibrant motion and beauty to your outdoor space. Place it in a visible area, such as near flowers or a patio, to maximize its visual appeal. Regular maintenance, like cleaning and lubricating, ensures smooth operation. Customize it with paint or decorations for a personal touch. Watching it spin effortlessly in the breeze will give you a sense of accomplishment and joy. It’s a perfect way to enhance your garden’s charm and functionality.

Additional Resources
For further guidance, refer to detailed assembly manuals available online or join wind spinner enthusiast communities for tips and support; Check manufacturer websites for PDF guides.
Where to Find Detailed Assembly Manuals
Detailed assembly manuals for wind spinners are often available on manufacturer websites as downloadable PDFs. Check the official product page or support section. Online marketplaces like Amazon may also provide manuals with product listings. Additionally, forums and DIY communities share user-uploaded guides. Ensure you download the correct manual for your specific model by verifying the product name or part number. For the most accurate and up-to-date instructions, always rely on official sources rather than third-party sites.
Online Communities for Wind Spinner Enthusiasts
Online forums, social media groups, and specialized DIY websites are excellent resources for wind spinner enthusiasts. Platforms like Facebook groups, Reddit, and Pinterest host active communities where users share tips, troubleshooting advice, and creative ideas. These spaces often include detailed assembly guides and photos. Enthusiasts can also find inspiration for custom designs and modifications. Joining these communities provides valuable support and connects you with others who share your interest in building and customizing wind spinners.
No Responses